Wednesday, September 8, 2010

Bedroom Fireplace-Part 4

The oval on the left is what I am going to put on the board on top of the fireplace.  I had to cut down the original oval on the right to fit the space.  I used the saw on the right to make cuts so I can break the pieces apart. 
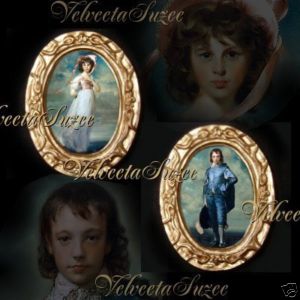
The oval on the left is attached to scotch tape so I don't lose any of the parts.  I plan to glue the parts together and fill in the void spots with caulk.
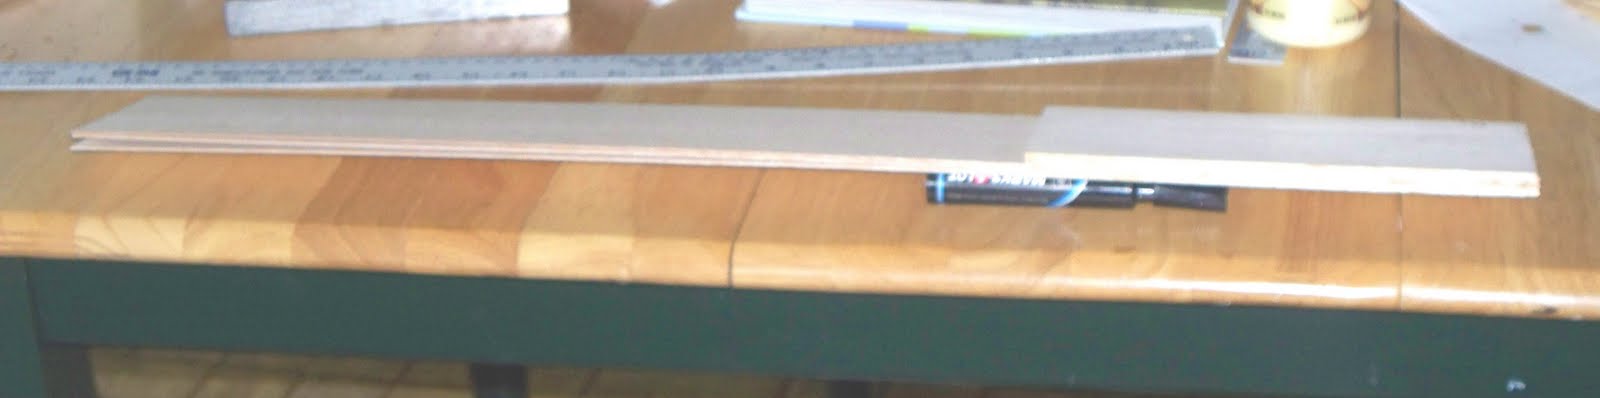
The two little wallshelves on the far left will be put in the top and bottom area of the oval.  I have mud men to put on them.  The shelves are too tall for the space, so I am cutting off the bottom of the shelf.  It is REALLY hard.  If I use a bigger saw the resin will pop appart in the wrong place. 
Next process is paint the resin and gule to fireplace backing.  Then I will put up the electric tape, wallpaper and lastly the backing and fireplace.  It seems it never ends.
Bye,
Kate

Friday, September 3, 2010

Bedroom Fireplace-Part3

Today I mixed the paints to match the fire place.  I am really good at matching colors.  It  helped to have the back of the fireplace to test colors on.


Here is the fireplace back painted to match the fireplace.  I found two pieces of molding to put on either side of the back and painted them to match.  Now if I could quit being SOOOO LAZY, I could get this room almost finished.  I think the next thing I am going to do is put the rattan mat on the ceiling-that is going to be difficult.

Kate

Wednesday, August 25, 2010

Bedroom Fireplace-Part 2

Today I took the fireplace backboard and belt sanded the edges-with my husbands help.  I brought the piece in the house and fine sanded the rough edges-I am using balsa wood.  Balsa has become my favorite wood-it is very light weight and easy to work with.  Next, I Kilz the backboard and Friday hope to mix paint to match the fire place and then paint the backboard.  Then for the SURPRISE!!!

Sunday, August 22, 2010

Bedroom Fireplace

Well, I am finally back at work: this time on the bedroom fireplace.  I needed a back bumpout behind the fireplace for a special project.  There are many more post to come on this fireplace.  Here are some photos:

This is how I glued the six boards together.  An angel was watch over me as I had the exact width of boards to do this project.  Julia Child would have been proud.


The board will be in the center of the back wall with the fireplace in front of it.  I can't wait for you all to see how I finish it-secret!!!


Thanks,
Kate

Sunday, June 27, 2010

Back at Work

This floor is from a ratan mat.  Excuse the French, but it was a bitch to cut.  It took me 4 hours.  It fell apart on the edges and I had to glue the pieces together on both front and back edges.  That left a 1 inch shiney line on both edges, so I sprayed the whole thing with Patricia Nimocks matte spray. The End.  Now all I have to do is glue it down when it drys.  All I have to do is decide which glue.  I have an old bottle of Grrrip I should use-it is not cheap.  So I will whip out my credit card and spread the glue-works great.


This is the second floor center hall.  This also took 4 hours.  I don't know why I had so much trouble.  It is going to be stained walnut.  I would use contact cement to glue it down, but I have a hard time getting things in the right place the first time. (See the old post about the living room floor)
FYI: the papers with the blue painters tape are my templates for electrical and wallpaper.  Work great. 

Thursday, May 27, 2010

Moving Things Around

One night, a couple of weeks back, I was sick and up all night.  While I was sitting on the couch, watching Martha Stewart, this huge-I MEAN HUGE-idea came to me.  I have an odd layout in my faimly room, and the Chateau Chanticleer being on the only window wall did not help.  The photos don't show it very well-use your imagination.  AND I know I look like a hoarder, but all that stuff goes in the dollhouse.  All I have to do is put on the doors and roof and the Chateau will be ready to finish (it should take 6 to 12 more months).  Any way, these are the BEFORE pictures.


The terra cotta leather chairs use to be on the right.


I am so excited we did this.  I can not believe there is sooooo much stuff in building a mini house.  Anyway, you can certainly see how crowded it was.  The base the house sets on is 3 ft X 6 ft.  So below are the after pictures.  I love it.
Now the doll-house is in the useless corner and the chairs fill out the seating area.  Now all I have to do is get the doll house finished.  I really can not believe we did this.  And I really can not believe I did not think of it sooner.  Before I had a swing arm wall lamp between the chairs.  I don't need that now, so I think I am going to put the lamp to the right of the dollhouse so that corner is not so dark.  There is going to be a conservatory on the right side of the house and it will need to be illuminated. 
Thanks,
Kate

Tuesday, May 11, 2010

Making Plans

Sorry, no pics today, just ideas.  I have been sick for two weeks and have done NOTHING.  I am very aggravated about that.  But, while sitting on the couch last night, suffering, I had a whopper of an idea.   I was watching Sarah's House and saw a living room she did-the light bulb came on.  I am going to move every thing around in the family room, esp. Chateau Chanticleer.  I have an odd shaped family room, and after everything is moved around, my new mini house (which is still in the box) and the adobe will all have a place to live.  And there will be more seating for real people.  It is probably going to take 4 to 6 months to do-I will send pictures when it is done.
Another road block is I am waiting for sconces and lights to arrive.  I could be sick as a dog, and still work on the Chateau if I had all the parts. 
Going to the Dallas Mini Show this weekend-if you see me, stop and say HI!

Kate
www.katescats.com

Friday, April 23, 2010

My Dollhouse is in Idle Mode

I have been whining about the bedroom wall paper for ages-and I am at a dead stand still.  I think I have found the perfect paper.  I hope it does not take long to get here, as I would like to get on with it.

After Mother's Day, my hubby and I are going to lay the house on it's back on the kitchen table and put the doors on the house.  After that we will put the house in it's permanent place on the platform.  There is a conservatory (not yet made) on the right side and a two story add-on on the left side.  I saw a way to really jazz up the conservatory in a Mini Mag (forgive me, I forgot which one) and the add on is a kitchen (chicken/rooster theme) and 2nd floor bathroom.  At this point, I would like to SING the praises of Real Good Toys (the birthplace of my dollhouse).  They have always been there to help.

For the dining room I found  Pinky and Blue Boy.  They will look great.  I bought them on Ebay from velveetasuzee.  I have bought tons of pictures from them, and love them all.


In one stair hall, I am going to have oriental black paper.  I think I have found 4 cat pictures from velveetasuzee in black to hang in the hallway.  I saw a wall with ton of pictures on it and loved it.  I think it was Harry Potter.

Well, that's all for now.
Kate
www.katescats.com

Thursday, April 15, 2010

On To The Bed Room


This is the dining room which is basically finished.  I have not done anything so suttle before-can't wait to get the furniture in.


This is the furniture for the bedroom with Bespaq Bird and Mountain Design.  It is an old design and I love it.


This is the paper I am going to use after I white wash it.  I am working on a Hub on http://www.hubpages.com/   on how to white wash the wall paper, but it is not finished yet.  I saw it done in Magnificent Miniatures and loved it.  Can't wait to see how it turns out.
Kate
http://www.katescats.com/

Saturday, March 20, 2010

Dining Room Papered and Wired

My dear husband, Doug, is roto
zipping a small slit in the top floor of the Chateau so I can run the tape wiring into the attic. Believe it or not, I have finished wiring and papering the dining room. In my last post I was fretting over the wallpaper. Well, I got the first wall up and was thrilled with the results. Next is the ceiling, then the carpet on the floor. I know carpet is out of style, but I have it, so I might as well use it. The carpet really looks great. The room is very fun and happy. Will post again when the carpet and ceiling are in.
Kate

Saturday, March 13, 2010

In a Dither

I am going to start on the dining room in the Chateau. If I make a typing mistake, forgive me, 'cause I'm typing w/o my glasses. After using the wallpaper from Spain, I really don't want to use the thin wallpaper I have-but I have to be practical about this. The paper and the carpet match the furniture exactly.....and I like the soft palette. I bought this adorable chandelier and 2 wall sconce with pink tulip shades to go in the room-I really want to use them. So, after alot of deliberation, I am forging on with what I have. I am going to get some rad moulding-which should help. I am hoping to start on the room later today.
Hi to all my followers and I'm sorry there were no pictures-just thoughts.
Kate

www.Katescats.com

Thursday, March 11, 2010

Library Basics Finished


I was like a woman possessed tonight-I had to finish the basics of the library. The orange dots (there are three down the center and two across the back) are for hanging lights and the electricity to all of them works-pat on the back. I did not notice they were out of line-it does not look like that in person. The ceiling is more cream. The book cases need to be detailed and filled with books, then glue to the walls-after the front doors are in place (see the hinge on the right) on the dollhouse. I also have to put up molding-later. Next, I am starting on the dining room.

I was going through a box I keep all the lights, wallpaper, accessories, etc in, and to my shock I found two more book cases and a ton of books. I do not think I will have to worry about filling the shelves with books any more. I also found this toile wall paper that is not usable. The design is hugh. I might could cut out some of the scenes and put molding around it. I hate it and don't think I will use it. I have some small print toile some where-I will look tomorrow.

Thanks, Kate

http://www.katescat.com/

PS: I went and looked at the orange dots and they were out of line-I fixed them. All is well in the Chateau.

Saturday, March 6, 2010

Beginning to Wallpaper the Library


First of all, I want to make the naming of the Big House official-it is now Chateau Chanticleer. I would like to thank all my mini friends for the suggestions. I would have NEVER come up with such a great name.
Now to the library-the photo on the left is the wiring. The tape is coming of the main tape on the right wall-and it works-YEA! The photo in the middle is the Spanish paper going up-georgeous. The photo on the right is the Wooten desk in front of the wall paper. The wall paper came from http://www.leschinoiseries.com/ They have new papers under the Museum section that are to die for. I am getting Turia Silk for the baby's room. It is a heavy paper and GREAT to work with-best I've ever used. Hopefully I will put the other two sides up and put up the ceiling paper tomorrow. I am SO excited it is going so well.
Kate

Friday, February 26, 2010

Next Stage of Library in Big Dollhouse


On the left, I am Kilzing the library. I forgot to Kilz the living room. I hope nothing falls of the wall in that room. The middle picture is the finished floor. (actually I have one more coat of clear varnish to put on the floor) I used clear varnish because if I used light oak it would yellow the painted part of the floor. The floor is going to yellow some anyway.
On the right is the anaglipta ceiling paper. The holes are where the hanging lights are going to be. I am going to paint the ceiling off white (more like very pale beige). Before I hang the ceiling paper I have to wire. Maybe I'll do that tomorrow.
I am really excited about the flowers I got from Ebay today. They are great. I can't wait till I start landscaping the out side-long way off.
Thanks for stopping by,
Kate


Tuesday, February 9, 2010

More Library Floor

The floor painting is finished. The photo is bad-there are little diamonds in all the corner. I will get a better picture later. Now all I have to do is put contact cement on the bottom of the floor and the top of the doll house floor and stickem together. Next I will put up the tape wiring, put on the ceiling paper, lastly my beautiful paper from Spain. I will have three book cases on each side of the room-I have figured out a design to put on them. The three book cases will be attach to each other and then attached to opposite sides of the front of the room's walls. At the very back of the library will be my Wooten desk and matching chair-THE FOCAL POINT of the room.
The picture to the right infuriates me. This is the living room floor with a BIG crack in it. It took two pieces of floor to cover the whole floor. I was very careful to make sure both pieces of the floor fit together. As life happens, it didn't happen. For some reason the floor was unlevel (earlier post). Me being the resourceful mini person I am, I just filled the crack with wood filler.
The crack is wide in the front and the back and meets in the middle. I am going to take a marker and darken the dried filler up and put the same stain/varnish on the crack. The back crack will fill with the varnish and will eventually be covered by a fireplace. I am crossing my fingers that when I put the stain/varnish on the crack, it won't be noticed. From my lips to God's ears.
Where is the sun???
Kate